11.25.2010

Thanks

I'm thankful for so many things...

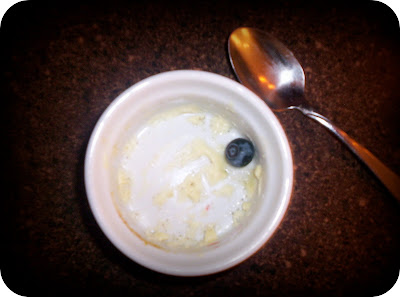
I'm thankful, for example, for this sweet potato pie.

And I'm thankful I got to cook all this delicious food. With help, of course.

And, lastly but certainly not least, I'm thankful for loved ones to share this bounty with.

Happy Thanksgiving to you and yours.

10.13.2010

Romance, Chicken, and the Pacific Northwest

In the summer of 1993, I saw a movie in the theater that was probably one of the first of many to give me a false sense of everything a romance should be. (Thanks a lot, Hollywood.) It tells the story of a man whose wife has just passed away and about how he finds love again with the help of his son, a radio show, and, well, fate. The film takes place partly in a famous city in the Pacific Northwest whose name appears in the title, and the man, who apparently seems to have a lot of sleepless nights, lives in a floating house that has a view just like this:

Ever since I saw above-mentioned film, I've been a little fascinated by--or shall I say obsessed with?--this city. I've always associated this place with love, dreams, happiness, romance--I'm such a sap! And maybe since it's known to rain a whole bunch here, I've also always had a thing for rain--standing in it, walking in it, smelling it.

So I finally went! And this is the view I had each morning as I awoke:

Sadly, it never rained once while I was here. The weather was actually really beautiful every single day. Go figure. Still, I would've liked to see the rain.

The first night, we went to this lovely restaurant in the quaint little town of Langley on Whidbey Island in the middle of Puget Sound. I opted for the roasted free range chicken breast with polenta, braised endive, and rosemary-gorgonzola pan jus. The chicken was fabulously succulent, and the polenta crispy on the outside and perfectly not-too-mushy on the inside. My dinner companions, two people I lovingly refer to as Mom and Dad, shared the steak frites served with sauteed local greens, which were to die for--no kidding! I could have eaten an entire dinner plate of those. The skinny frites were fried to golden perfection; I almost wish I had gotten the steak frites, too. (See website for pics.)

And as it goes, a superb evening meal must be followed by a lazy evening stroll through a tiny tranquil town...

...At sunset.

Ah (that's an ah of contentment)... Almost makes me think that maybe the stuff in the movies isn't far off. For pretty soon after this, I was, myself, Sleepless in Seattle...

Kind of.

10.04.2010

Teaser

Guess where I've been...


Nope. Not the Big Apple.


Wrong again. Not back to DC. (Although I wouldn't have complained.)


And no, no, no. Definitely not South Texas.

Need a hint? Okay, but this is a dead giveaway:


Did you miss it? Look again closely...


...And pull up a seat. There's more to come. And yes, there will be food.

9.13.2010

...And we're back! (or I love this town!)


Have you ever visited a brand new place and felt as if you were at home, or at least in a very familiar place--sort of like deja vu, except you know you've never been there before, even in another life, and you wonder why it took you so long to finally get to that place?

Well, having traveled to remote areas of the Far East and the tiniest villages in the Old World, I find it absolutely astonishing that it's taken me more than thirty years to get to my nation's capital.

When views like this are everywhere you turn. Views that even George and Martha enjoyed.

And where you can take pictures from way up high like this FOR FREE.

And where you can get this close to where the President lives.

And then you can literally walk down the street to a farmer's market in the middle of the week at the end of the workday (or after a long day of exploring FREE museums and monuments and beautifully clean streets where you don't feel afraid to walk) and buy this delicious and refreshing organic drinkable yogurt with honey made from the milk of grass-fed cows and with probiotic and live cultures from Clear Spring Creamery.

And nibble on these cute little mildly spicy beef and chicken empanadas from Chris' Marketplace (apparently known for their amazing jumbo lump crabcakes).

And then top it all off with this incredibly craveable pastry filled with a layer of chocolaty goodness and a dollop of luscious, velvety pistachio cream. Oh my, oh my.

Then, of course, you've got to grab a couple of these scrumptious cookies (namely, lemon drop, lemon ginger, and double chocolate) from Praline Bakery (same place where the pistachio chocolate pastry can be found) to mischievously nosh on after midnight (without feeling guilty, of course, because, hey, they're from the FRESHFARM Market, by the White House!).

What a magnificent town.

What a magnificent country.

I'm proud to call it mine.

7.10.2010

Hold on...


...just a little bit longer. I haven't forgotten about you.

5.16.2010

Moved

Hello, everyone...if there is anyone out there reading this. I just wanted to let you all know that I haven't fallen off the face of the earth. I've been in the time-consuming process of moving. I've missed blogging and can't wait to get back to it. So, please stay tuned!

4.19.2010

Simple and fresh

I recently went to a wonderful cooking demonstration at Central Market taught by Virginia Willis, a lovely French-trained chef from the South who is also a culinary television producer. The title of the demonstration was "The Flavors of Fresh Herbs," and it was absolutely delightful in that it tantalized every one of my senses. Luckily, I got to partake of all the food Virginia prepared using lots and lots of fresh herbs, and, oh!, what a party in my mouth! Virginia says she mostly uses fresh herbs in all her cooking, and now I am a firm believer that fresh herbs make all the difference.

Take these potatoes, for example. Regular, old little red potatoes. But stick a fresh bay leaf or two inside and roast them for a while and you've got the most perfect little almost sweet-scented potatoes ever. I never knew what bay leaves really tasted like until I stuck these in the oven only to find the smell of bay permeating the rest of my little apartment.

Before:

Think those leaves in the jar can do that??? Virginia noted that "even a semi-fresh bay leaf several weeks old from the fridge will have more flavor" than those "brown, tasteless dried bay leaves" you've had sitting in your spice cabinet for--what, 3 or 4 years now? Duh! How can they be good?!

After:
(Imagine: the smell of bright little bay leaves wafting through your house...)

Indeed, I have learned my lesson well. Make no mistake about it: fresh is ALWAYS best. Just try and see for yourself.


Bay Roasted Potatoes
Adapted from a recipe by Virginia Willis from Bon Appetit, Y'all

8 medium red-skinned or Yukon gold potatoes (or double that number if you're using small ones like I did)
16 to 20 fresh bay leaves (again, double the number if using small potatoes)
1/2 cup olive oil
kosher salt
freshly ground black pepper
sea salt, for finishing

Preheat the oven to 350 degrees Fahrenheit. Using a sharp knife, thinly slice each potato, stopping each cut 1/4 of an inch from the bottom, so the potato is sliced, but still intact. Insert 1 to 2 bay leaves into each potato.

Place the potatoes in a large roasting pan. Drizzle oil over the potatoes and toss to coat. Season the potatoes with kosher salt and pepper.

Roast the potatoes until tender when pierced with the point of a knife, about 1 hour. Season with sea salt and additional freshly ground black pepper. Serve hot.

Serves 4 to 6.

4.04.2010

After the feast


The worst part about having a party? No, it's not all the dirty dishes in the sink that you're going to put off until later in the week when you're finally feeling up to it. No, no, I think it's the quiet after the storm. You know, when everybody leaves and you realize that the room is no longer buzzing with delightful chatter and polite raves about the food. And then you get all depressed wishing your company would've stayed longer.


But then you think to yourself, "I should do this more often," and that all the stressing and fussing was unnecessary. And then you start dreaming of the next time you're going to have a gathering. So you get all excited just thinking about and planning the menu you might put together.


And you realize, once again, that's what it's all about. That's what's most important. The people and the chatting and the memories and the sharing and the laughs. So you have stuff to talk about later. Which keeps you connected to the people in your life.


And yes, of course, the food is important, too. I'll be the first one to tell you that. Good food is important. It gives you something to talk about, especially when it's interesting and fresh and new. And it makes you feel joy. It makes you happy because it nourishes you, both physically and emotionally. We're really lucky that something God meant for us to do every day is also something that can be pleasurable, amusing, and fun, too.

Today I cooked up a couple of new dishes for my friends. I'll share one of the recipes with you today and save the rest for later. It's an easy one, and appropriate for an Easter feast or for any time of year, especially suited for the Easter bunnies in your life. And it won't stress you out, promise. It's a snap: Honey glazed carrots. Deliciously sticky and buttery and slightly sweet. EnJOY! And Happy Easter, too.


Honey Glazed Carrots
Adapted from a recipe by Sunny Anderson from Cooking for Real

kosher salt
1 pound baby carrots
2 tablespoons butter
2 tablespoons honey
1 tablespoon lemon juice
freshly ground black pepper
1/4 cup chopped fresh flat-leaf parsley, for garnish

In a medium saucepan, bring water to a boil. Salt the water, and then add the carrots. Cook until tender, about 5 to 6 minutes (pulling one out and eating it, or stabbing one with a fork is a good test). Drain the carrots and return to pan over medium heat. Add butter, honey and lemon juice and stir to combine, making sure to coat all the carrots. Cook about 5 minutes, until a glaze forms over the carrots. Season with salt and pepper, to taste. Garnish with parsley. Serve hot or warm.

3.17.2010

Do the Irish eat spinach?


Tonight as I took stock of the items in my refrigerator, I started making big plans to have a healthy spinach salad as I pulled a four-day-old bag of fresh, local spinach out from the bottom shelf. I grabbed a few more ingredients to add to the salad, opened the bag and as I started putting it into a colander to rinse it, my heart sank: a classic case of the wilting greens! Now, I don't know about you, but I'm not really into wilty salads. So, without a thought, I did what any food lover would do--I ran to my computer, clicked on my bookmark for the Food Network website, and poof! I had a recipe for garlic sauteed spinach from Ina Garten. I thought since the spinach had started to wilt, sauteing it would solve the problem, since when you saute it, it wilts anyway, but it tastes good. A few simple ingredients and a quick trip to the saute pan and voila! Delicious, garlicky, fabulous, warm spinach. The perfect cure for the wilted green blues.


Happy St. Patrick's Day!

Garlic Sauteed Spinach
Adapted from a recipe by Ina Garten

This is a great recipe to make on the fly when your nutritious greens are wilty and sad-looking. It's tasty, satisfying, and makes a great side for any meal. It also makes a great meal by itself if you just want a little something. The lemon is key to brightening the dish. This might be great, too, with a little bit of grated Parmigiano on top (ease up on the salt, though).

16 ounces baby or regular spinach
Extra-virgin olive oil
3-4 cloves garlic, chopped
Kosher salt
Freshly ground black pepper
1 pat unsalted butter
Lemon juice
Sea salt, optional

Rinse the spinach well in cold water and dry it, but leave a little moisture on the leaves.

In a large pot, heat the olive oil and saute the garlic over medium heat for a minute or less, making sure the garlic doesn't brown. Add the spinach, salt and pepper to taste, and toss it with the garlic and oil. Cover the pot and cook for two minutes. Uncover the pot, turn the heat to high, and cook the spinach for another minute, stirring with a wooden spoon, until all the spinach is wilted. Using a slotted spoon, lift the spinach to a serving bowl and top with the butter, a squeeze of the lemon juice, and a sprinkling of the sea salt, if desired. Serve hot.

Serves 4.

3.10.2010

Sempre Famiglia

When I was eight, my family started taking yearly week-long vacations to Southern California. We would drive seven hours from Phoenix pulling an old, used tent trailer and would set up camp at one of the public beach campgrounds in Orange County. Our favorite place to go, although it required what seemed like a mile-long, steep paved walk up from the beach to the campground after a day of playing hard in the ocean surf, was San Clemente State Beach. The first year we started this family tradition, we happened upon a family-owned pizza place in town and we had to go there every year following. The place was always hopping at night with locals and vacationers alike, and it's no different today.

It's called Sonny's, and they serve my family's favorite pizza. It's thin, crispy, even charred a little on the bottom, and is topped with, in my opinion, the world's best tomato sauce, along with whatever else you want. My family particularly likes the sausage pizza, the addicting taste of fennel from the sausage dancing on our tongues. We also love the meatballs, and we usually get a few on the side to share as an appetizer. (Dad likes a bit of gorgonzola on the top.) The leftover sauce can be used for dipping pizza. Believe me, you won't want it to go to waste.

Sadly, I haven't been to Sonny's in a few years, work and distance not allowing me the visit. Luckily, though, just a couple hours north of my very own hometown is a restaurant run by the same family to which Sonny's owner belongs. That one is called Genovese's and serves similar pasta dishes and pizza. Although not exactly a carbon copy of the first restaurant, you can still enjoy that same satisfying, crunchy crust, the savory, delicious sauce, and the fennel-y, tender sausage that makes Sonny's a family fave.

I actually had the rare pleasure of going up there this past weekend with Mom and Dad. And it just so happens we were on the way back from the glory of all Arizona...

...to which I had never been in my life. And I'm an Arizona girl. But California sort of feels like home, too, in a way. And all this thinking of Sonny's makes me want to go back soon--if I can ever make it. I am glad, though, that Arizona has something to tide me over until I get there.

Thanks, Genovese's.

And one more thing: On the wall of Genovese's is a little plaque that reads "Sempre Famiglia" which means "Always Family." It has caught my eye each time I've walked through the door of the cozy little restaurant. Always Family. Isn't that what food is all about? Serving, sharing, enjoying, savoring--with the ones you love. Always.

2.28.2010

Therapy


Right now I'm kind of obsessed with risotto. It seems like whenever I find it on a menu, I order it. And whenever I have the time (key word here: time), I make it. Although risotto is a time-consuming and high-maintenance dish, I find it very therapeutic to make, especially after a long hard day of drilling the present perfect progressive into students who could care less. It really is healing to me, though, kind of like sitting down and playing the piano for a few hours was when I was a kid, much to the annoyance of my three siblings. (If it makes any difference, guys, I haven't played the Spinning Song for 15 years!) I like to pour myself a tall glass of pomegranate juice, flip on a little Iron Chef America, and stand next to the warm stove, stirring and dreaming of places like Paris and Transylvania. (Yes, Transylvania is romantic. Especially when it snows.)


I've made this recipe now several times for a couple friends and for family. Every time, it's been a hit, especially if I serve it in those cute little lemon "cups." If you're new to the world of risotto, this is a good one to start with. Like I said earlier, it does take time, so don't make it if you've got to be somewhere in an hour. You've got to treat this dish like a baby, tenderly and lovingly feeding it with broth when it sucks up all the liquid you put in just a few minutes ago and stirring it constantly. You do this for anywhere from 20 minutes to a half-hour. Maybe even a little bit more. No matter how long it takes you to make, though, I assure you, you'll love it. You'll be back for seconds and you'll be dreaming of it for the next several days, longing for its creamy, comforting texture and its balanced cheesy and lemony flavor. The lemon delightfully brightens the heaviness of the Parmigiano and the ricotta. I think you'll become obsessed, too.


Lemon Parmesan Risotto
Adapted from a recipe by Giada De Laurentiis

Remember, this recipe takes time. But it is so worth it. You don't have to prepare the little lemon cups for it, although they're a great idea for a dinner party. This risotto pairs nicely with some good stuffed peppers and zucchini. Giada has a great recipe here. Also, remember to use low-sodium chicken broth so you can control the amount of salt in this dish. You can use regular broth if you don't have low-sodium, but do be careful with the salt at the end. Taste, taste, taste before adding more.

2 1/2 cups low-sodium chicken broth
2 tablespoons butter, plus 1 tablespoon
1 large shallot, diced
1 cup Arborio rice (you must use this kind of rice)
2 tablespoons grated Parmigiano-Reggiano, plus 2 tablespoons
2 tablespoons ricotta cheese
1/2 a lemon, zested and juiced
3/4 teaspoon kosher salt
3/4 teaspoon freshly ground black pepper
6 lemons, for serving

In a medium saucepan, bring broth and 1 cup water to a simmer. Cover the broth and keep hot over low heat.

In a medium, heavy saucepan, melt 2 tablespoons of the butter over medium heat. Add the shallot and saute until tender but not brown, about 3 minutes. Add the rice and stir to coat with the butter. Add 1/2 cup of the simmering broth and stir until almost completely absorbed, about 2 minutes. Continue cooking the rice, adding the broth 1/2 cup at a time, stirring constantly and allowing each addition of the broth to absorb before adding the next, until the rice is tender but still firm to the bite and the mixture is creamy (tasting is the best way to judge this), about 20-30 minutes. Remove from the heat. Stir in the remaining tablespoon of butter, 2 tablespoons of Parmigiano, ricotta cheese, the lemon zest and juice, and the salt and pepper.

To serve, cut 1/4-inch off the bottom of each lemon so they stand on their own. Take 1-inch off the stem end. Using a grapefruit spoon or something similar, scoop out the flesh of the lemon and discard (unless you want to use the juice for something). Fill each lemon with risotto. Sprinkle the tops with the remaining Parmigiano. Serve immediately.

Serves 6.

2.21.2010

For picky eaters

Mom wasn't an experimental cook when we were younger; she couldn't have been--we were too picky. And so was my dad. (He still is.) One simple meal Mom made on a lazy (or busy) Saturday afternoon that appealed to and satisfied all of us was cheese crisp. In Arizona, these are basically open-faced quesadillas (read more about them here), although Mom would usually ask whether we wanted ours folded in half or flat; they were cheese crisps to us either way. And we loved them. When I was little, I liked the folded kind because the cheese and the tortilla were soft and it seemed like the "hot sauce," or salsa, clung to them a little better.


Now, I prefer my cheese crisps open-faced on whole wheat or multi-grain tortillas, with not too much cheese, barely golden brown on the bottom with crispy bits of cheese around the edges and topped with avocados and tomatoes. Kind of like Mom made.


Arizona Cheese Crisps

1/2 tablespoon butter
4 small multi-grain or whole wheat tortillas
1/2 to 3/4 cup shredded Mexican-style cheese (the one I prefer contains cheddar, asadero, queso quesadilla, and monterey jack)
1 avocado, sliced
2 tomatoes, sliced or diced
salt

Melt the butter in a medium non-stick pan over medium heat. When the butter is melted, place one tortilla on the pan and immediately top with a thin layer of cheese, covering the tortilla all the way to the edges. Cook until the bottom is golden brown and the cheese is just melted and crispy at the edges. Remove from the pan and set aside on a plate. Repeat with the remaining three tortillas. If the tortillas start browning too fast, take the pan off the heat, wipe the butter off with a paper towel, and put the pan back on the heat with another pat of butter. When melted, add another tortilla and cheese on top.

When all the tortillas are cheesed and crisped, top with sliced avocado and tomatoes. Add a pinch of salt to bring out the flavor of the avocados and cut into wedges, if desired. I like to pick the whole thing up and eat it bite by bite myself.

Serves 2-4.

2.15.2010

Meant to be

Sometimes the best comfort foods are combinations we've never tried before. Go figure. Take this combination, for example: sweet pears, nutty cheese, and spicy arugula between two slices of ciabatta. These are ingredients meant to be together, more so than I originally thought.


My friend Lark helped me make them last week, and we found ourselves stuffing the last bits of leftover pear slices and nutty, delicious cheese into our mouths when our sandwiches had disappeared into thin air.


Simple, sweet, and savory, too. If you're in the mood for something simple and homey, but also new and exciting, try these panini. I think you'll like them.

Pear Panini
Adapted from a recipe by Giada De Laurentiis

If you have a panini machine, ignore the stuff about cooking these on a pan and using an extra one to press the sandwich. Just use your machine instead.

8 slices ciabatta or country bread
1/4 cup olive oil
8 ounces sliced Taleggio cheese, brie, or nutty, melty cheese (I tried an Italian cheese I'd never heard of before and can't figure out the name of it at the moment, but I'll keep doing my research and let you know.)
2 large pears (I used "Best Ever" pears--perfect!), cored and cut into 1/4-inch wedges
2 tablespoons Agave nectar or honey
Pinch salt
Pinch freshly ground black pepper
3 ounces arugula or spinach

Preheat a non-stick skillet to medium. Brush the bread on both sides with olive oil and place the bottom half of the bread (only the inside part that will touch the cheese) on the skillet until toasty and golden. Continue with the inside of the top slices of the bread.

While the top slices are toasting, begin forming the sandwiches. Divide the cheese among the warm bread so it can start melting. Cover the cheese with pear slices. Drizzle the pears with the Agave nectar or honey. Sprinkle with salt and pepper. Top with a handful of arugula. Place the toasted top half of the bread over the arugula and return the completed sandwiches (2-4 at a time) to the skillet. Place a smaller skillet on top of the panini and place a few heavy cans of food into the top skillet to press the sandwiches for 1-2 minutes. Flip the sandwiches over and do the same for the other side. Remove from the skillet. Cut the sandwiches in half and serve immediately.

Serves 4.

2.07.2010

A first time for everything


The first time I traveled overseas, I was so excited and nervous at the same time that I made myself air-sick. I can't describe exactly what I felt as the crowded two-aisled airbus started its descent over a new land. I think it was a mixture of fear of the unknown and the rush of doing something I'd never done before but always wanted to. This was similar to what I felt when I made creme brulee for the first time. Yes, really.


This is how I feel about my culinary concoctions. The combining and mixing of ingredients--simple and plain though they are of themselves--to create something as delightful and sweet and sophisticated as a creme brulee gives me a satisfaction I can't get anywhere else. Except for maybe on a trip across the sea.


Although the brulee is probably one of the most basic of desserts and one of the first culinary students learn, it's also classic, versatile, and finishes off just about any meal quite nicely. (And, you'll notice, I can finish it off quite nicely, too.) Its mellow vanilla flavor and light, creamy texture make the perfect companions for its carmelized sugary top, which somehow reminds me of marshmallows lightly toasted over a campfire. Even though it makes me as giddy and breathless as I get when I go to a far-off place, it still tastes kind of like...

Home.

Creme Brulee
Adapted from Alton Brown's recipe from Good Eats

Creme brulee is relatively simple to make, although you have to be careful about a few things. First, don't add the warm cream all at once to the egg yolks. You may end up with scrambled brulee. Also, remember to only add the yolks (the yellow part) to the mixture. The best way to separate the yolk from the white is to crack the egg, keeping the yolk in one half of the shell, and then transfer it to the other half of the shell while holding it over a bowl and allowing the white to spill out.

1 quart heavy cream
1 or 2 vanilla beans, split and scraped
1 cup granulated sugar, divided
6 large egg yolks
2 quarts hot water

Preheat the oven to 325 degrees F.

Place the cream, vanilla bean(s), and the pulp into a medium saucepan set over medium-high heat and bring to a boil. Remove from the heat, cover, and allow to sit for at least 15 minutes. Remove the vanilla bean(s).

In a medium bowl, whisk together 1/2 cup sugar and the egg yolks until well blended and it just starts to lighten in color. Add the cream a little at a time, stirring continually. Pour the liquid into 6 (7 to 8-ounce) ramekins. Place the ramekins into a large cake pan or roasting pan. Pour enough hot water into the pan to come halfway up the sides of the ramekins. Bake just until the creme is set but still trembling in the center, approximately 40 to 45 minutes. Remove the ramekins from the pan and refrigerate for at least 2 hours and up to 3 days.

Remove the creme from the refrigerator for at least 30 minutes prior to browning the sugar on top. Divide the remaining 1/2 cup sugar equally among the 6 dishes and spread evenly on top. Using a torch, melt the sugar and form a crispy top. Or, preheat the broiler, set the ramekins on a baking dish, and let the sugar carmelize, about 1 to 2 minutes. Allow the creme brulee to sit for at least 5 minutes before serving or place in the refrigerator for a couple minutes. Top with fresh berries and/or fruit.

Serves 6.